Thursday 2 May 2013

Lazy Daisy / Daffodil Stitch Tutorial

What a beautiful day today has been, a bit of sun was definitely needed around here.
After a lovely drive home from work through the back lanes with some tunes turned up on the radio (is it just me that turns the radio up when its sunny) I picked up my little miss from school and headed home. This is what greeted me on the kitchen windowsill. The one thing we do seem to grow well, beautiful Orchids.


So as the title says I'm bringing you a little flower themed tutorial. Its a great way to use a very simple stitch to make a really useful little embellishment, or you can use it in a larger piece of work (as I did in the work from the last blog post). So here we go....

The lazy daisy
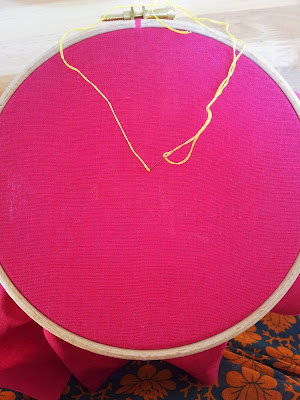
Start by bringing your thread up at a point where you would like the centre of your little daisy to be. Then take the needle back down through the fabric very close to where the thread has appeared


Pull this through until a large loop has formed (but not all the way through)

Then bring your needle up a distance away from the centre. The distance depends on how  wide you would like your final flower to be. As you pull your thread through the fabric make sure that your needle is going through the loop you have made. Once all the way through you should have  a petal shape. Take needle back down over the rounded part of this loop, making a small stitch

Like this! You have your first petal! This is also know as a detached chain stitch 

Add more petals in exactly the same way around the centre trying to make sure that they are the same length ( you can make this more accurate by drawing a small circle with a transfer pen (the kind that disappear or can be washed away) This will ensure that all of your petals are the same length. I tend to wing it!
Et VoilĂ   your finished daisy. You can decorate these further by adding a cluster of French knots in the centre or maybe even a bead or two. Try using different colours for each petal or even a multicoloured thread.

This is one variation that I came up with to turn this stitch into a daffodil like flower.
Make your original 'daisy' in the same way but leave a bigger hole in the centre, as above.
Then start to work French knots  around the base of your petals in a circle,
which will create the  trumpet of your daffodil.


Here is the finished daffodil. They look quite nice when you stitch them in cluster and amongst other flowers. 


Have a go, and if you do I'd love to see what you come up with. You could post a pic over on my Facebook page (the link is just at the side here) Or post to Instagram or Pinterest and tag me so I can take a look

Have a lovely Bank Holiday weekend (if you are in the UK) or just a great weekend elsewhere . I am looking forward to having my first go and hand-painting a skein of wool this weekend with a lovely friend. SO keep them peeled for the results here soon! 


Sunday 28 April 2013

High on a HIll

As I mentioned before, I had come up against a bit of a creative block where my designs were concerned. So I thought it might be good to blow those cobwebs away by stitching up someone else's designs. Luckily the perfect project leapt at me from one of my favourite Facebook pages, 


In Caroline's Etsy shop she sells (amongst all the other amazing and beautiful artwork) a brilliant PDF colouring book, Colour Me Happy, which is perfect for turning into embroidery patterns, so I downloaded this and chose
a design. (there are 10 to choose from).


Making a start - using trellis filled in with French knots.


Flowers are a great way of using lots of colour and stitch variety.
                                                     

I chose a vibrant turquoise linen to stitch on and used some gorgeous Weeks Dye Works over-dyed 
embroidery floss (a favourite of mine at the moment)
I scaled the design up slightly and this fitted nicely in to my 10" hoop, so quite large.

An overall view - about an hour into The Hobbit by now!

I transferred this design using a light box and a pencil but you could transfer it which ever way you 
find easiest.
I might do a post on different transfer methods? would anyone like that?


And here it is finished! It only took me a week!, I stitched through the whole of The Hobbit and then a bit here and there in the evenings 

If you'd like to do this yourself please visit Caroline's Etsy shop for the downloadable booklet
It's great and I intend to stitch lots more from it (which I'll share with you) 
A bonus was that whilst I stitched my little one could sit and colour in some more print-outs! 


Keep a look out here for stitch tutorials on some of the stitches that you see here .

<a href="http://www.bloglovin.com/blog/7275109/?claim=5gdtwcnwrfd">Follow my blog with Bloglovin</a>

Thursday 25 April 2013

Welcome!

So... Here it is, Stitchety Stitch, the blog I had been promising myself I was going to start for quite some time!

I am a lover of all things stitchy, knitting, dressmaking but mostly embroidery.
I have had previous ventures on-line with other crafts but have come to the conclusion that hand sewing, in all it's guises is where my heart (and hands) lie

I am planning on bringing you lots of things here on this blog and it's sister Facebook page, including tutorials, giveaways and hopefully a stitch-along or two, but most importantly lots of lovely images and inspirational photos of stitching, some my own work and hopefully some of yours.


My main focus at the moment is designing my own embroidery patterns, this little chap above will hopefully be amongst them. I had come up against a bit of  designers block but after my latest bit of stitching I am re focused and ready to get on with it.

I'll tell you all about my latest piece in my next post, I'd love it if you'd come back , just so I'm not talking to myself really!